You read that right—salad bowls.
The day finally came where I stepped out of my comfort zone and into my workshop (aka my living room floor) to try something I’ve always wanted to do: build my own furniture.
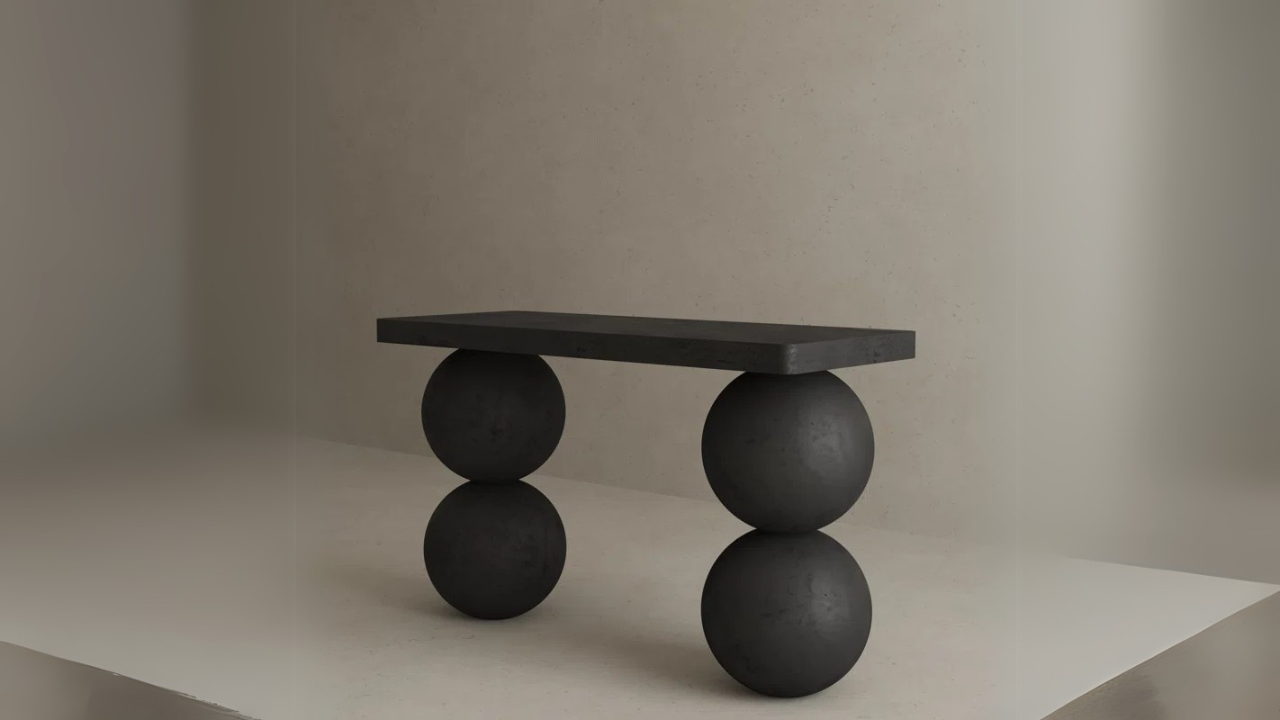
This designer-inspired console table was born out of a little courage, a lot of curiosity, and an IKEA hack that gave me the look for less. Whether you're a seasoned DIYer or just dipping your toe into custom home projects, this one is easy, affordable, and totally renter-friendly.
Let’s get into it.
✨ What I Made
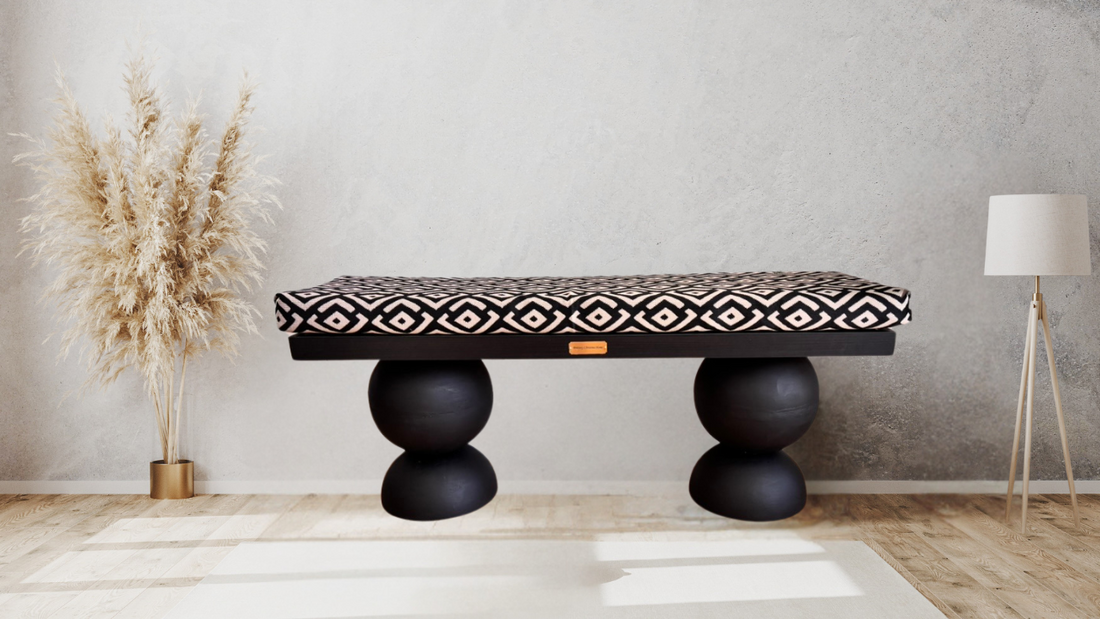
A modern, sculptural console table using:
- 12 IKEA “BLANDA MATT” bamboo salad bowls (yes, the kind you’d usually toss a Caesar in)
- A wood tabletop (I used a pre-cut pine board from Ikea)
- Construction adhesive and basic tools
The final result? A statement piece that looks like it came straight from a designer showroom.
🛠️ Materials You’ll Need
Here’s the complete list:
- (12) IKEA BLANDA MATT bamboo bowls (Large – 11” diameter)
- 1 wood tabletop (I used the Ikea Lack TV Unit approx. 48" long, 12" deep)
- Wood stain or paint (optional – I used an Onyx black Flat Paint)
- Sandpaper or sanding block
- Construction adhesive (like Liquid Nails or Gorilla Glue)
- Caulking Gun (Very Important, unless you have super strength)
- Wood filler (if desired for smoothing)
-
Custom Gold Name Plate (Optional for a nice finishing touch)
Step-by-Step Instructions
Step 1: Attach the Bowls
Flip your bowls upside down and remove the stickers, then rearrange them in whatever design you like—these will serve as the two “legs” of the table.
Using strong construction adhesive, apply a generous amount to the rim of each upside-down bowl. Let it sit for an hour.
Pro Tip: Place something heavy (like books) on top while drying to ensure a strong bond.
Step 2: Add Wood Filler
After the glue dries, place a generous amount of the wood filler on the seams of the bowls to fill in the gaps. Let this sit for one hour as well.
Step 3: Sand The Legs
Sand down the wood filler using a sandpaper of your choice, making the seams as smooth as possible. Then sand the entire surface of the legs until smooth. This will help prep for the paint.
Step 4: Paint or Stain
Using the paint of your choice, paint the legs and sit until completely dry. If you're staining, do this now and let it dry completely.
Step 5: Attach the Tabletop
Mark where you want your bowl “legs” to go. I placed mine a few inches in from each end to create a balanced silhouette. Using strong construction adhesive, apply a generous amount to the rim of each bowl. Carefully press your tabletop down onto the bowls. Adjust as needed, and clamp or tape in place until the adhesive sets (usually 24 hours).
Pro Tip: Place something heavy (like books) on top while drying to ensure a strong bond.
Step 6: Style It Up
Once dry, flip it over and place your masterpiece against a wall. Add some books, a decorative tray, a candle—or better yet...
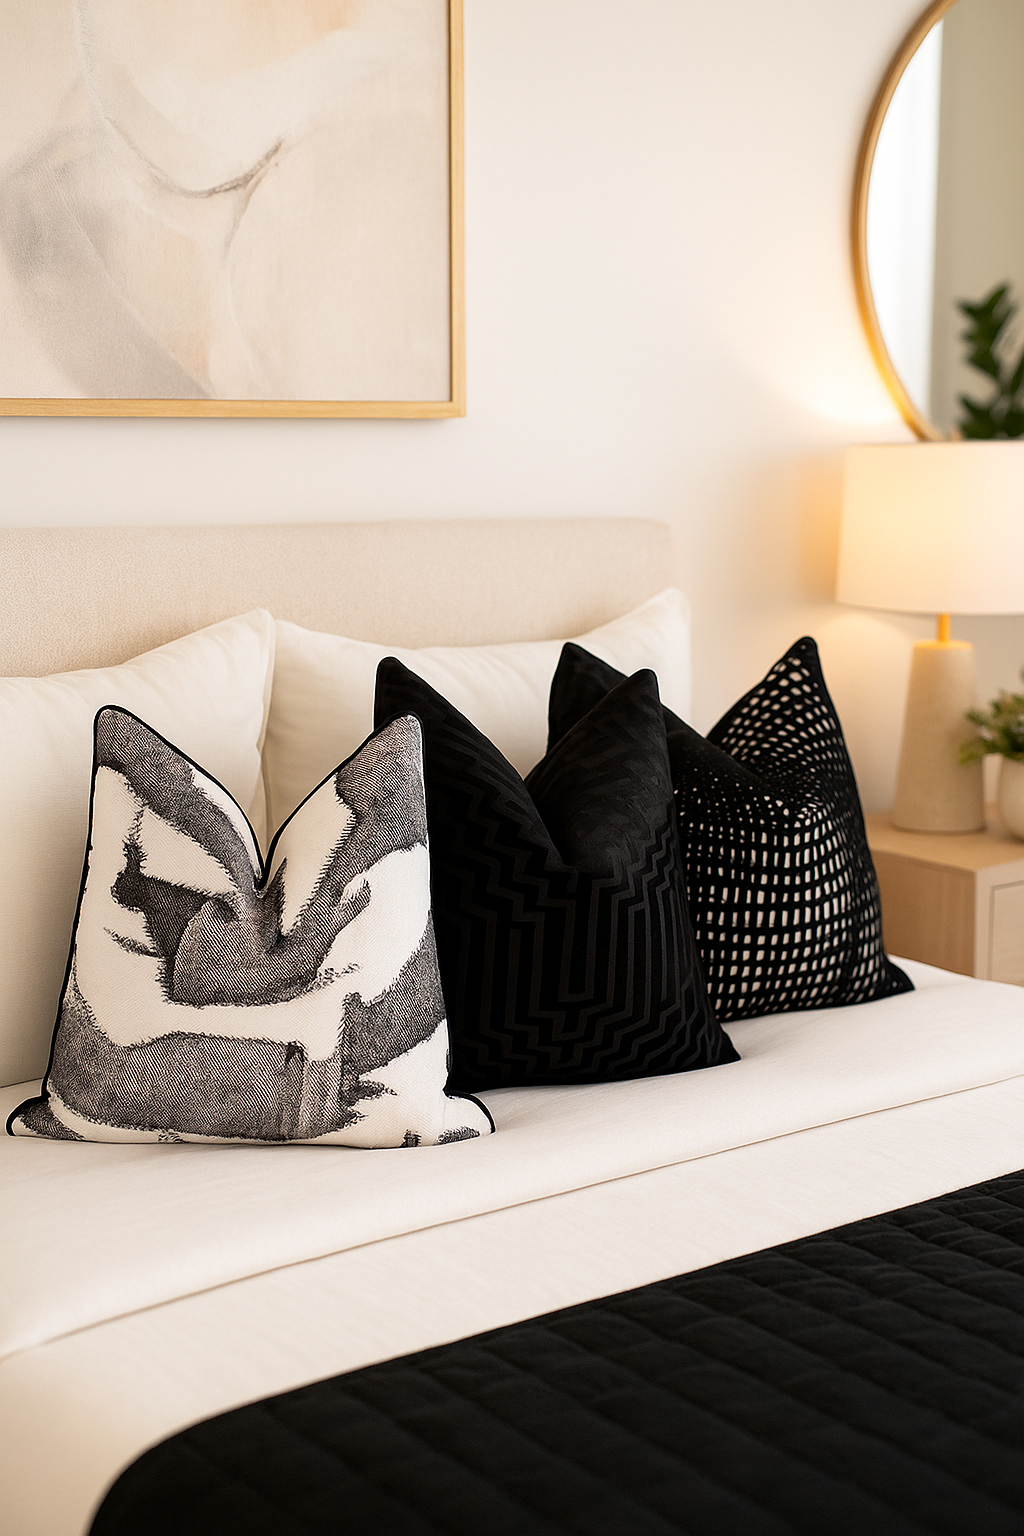
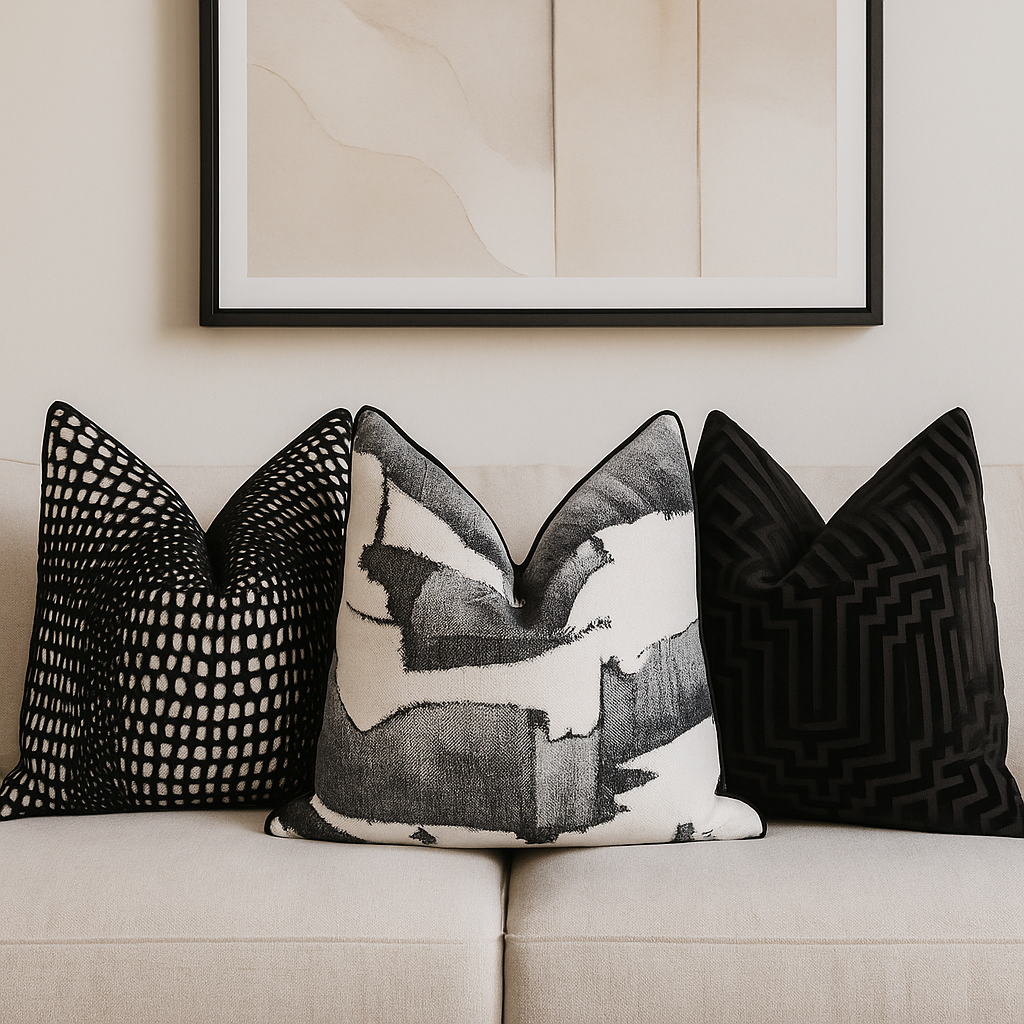
Style Tip: Pair It With a Brittany Christina Home Throw Pillow

This table was born for styling moments. I paired mine with the Muse Collection throw pillow in Urban Mesh to soften the space and add a pop of texture. Think gallery wall, sleek mirror, and cozy accents that tell your design story.
Because your home? It’s your gallery.
Ready to Try It?
If you recreate this DIY console table, tag me on Instagram @BrittanyChristinaHome and use the hashtag #BCHomeDIY—I’d love to see how you make it your own.
Until next time!